User Guide - Area Reps

Logging in to PELHAM

To access PELHAM visit the project site at https://pelham.pcuk.org and follow the “Area Reps” button at the top of the homepage.

You will need to enter your Area email address and the password given to you by the PELHAM Project Team.

Resetting your PELHAM password

If you have lost your PELHAM password and need to set a new one, please follow the steps below:

  1. Go to the PELHAM project site and click on the “Area Reps Login” button.
  2. On the Microsoft login page, click the “Forgotten my password” link:
Save some time!

 Save the PELHAM project site to your web browser’s bookmarks/favourites list – this will allow you quicker access each time you need to login or refer to the user guides.

How to Pin a frequently used page/view

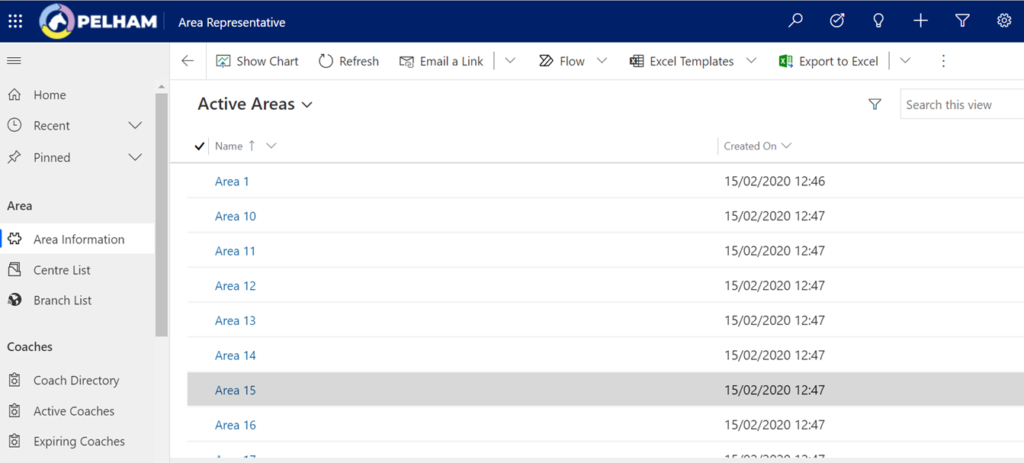
Click on arrow next to “Recent” on the top left of the screen:


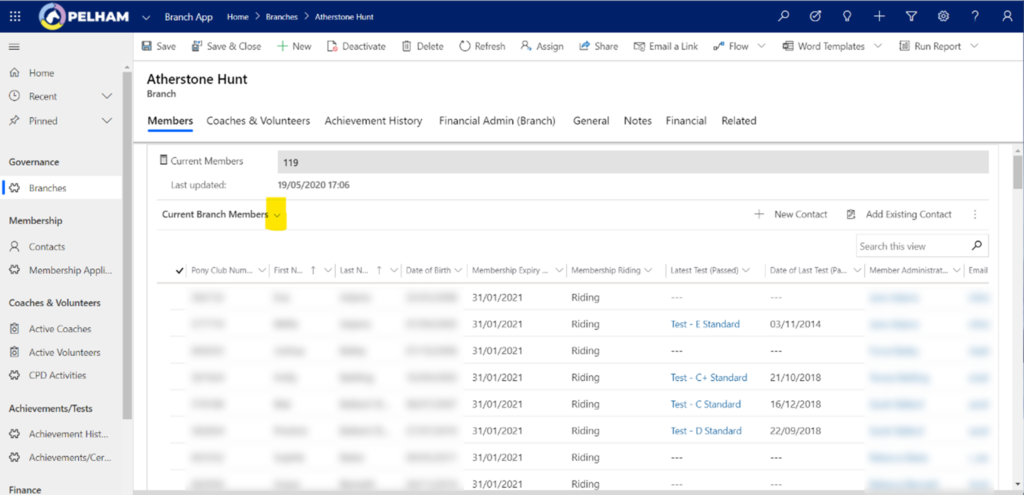
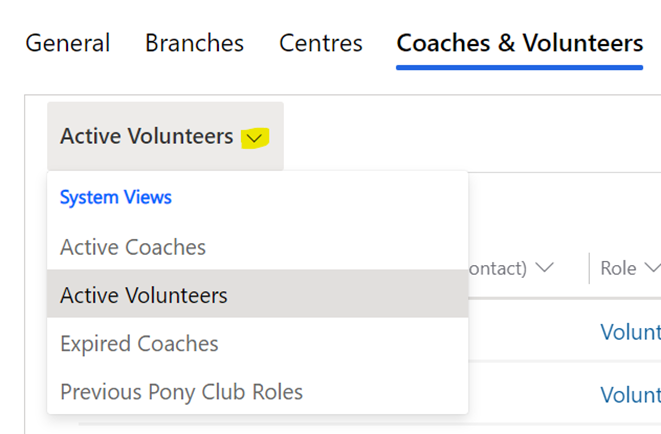
From the drop-down list that will appear click on the “Pin” symbol beside the relevant item, example Branch:


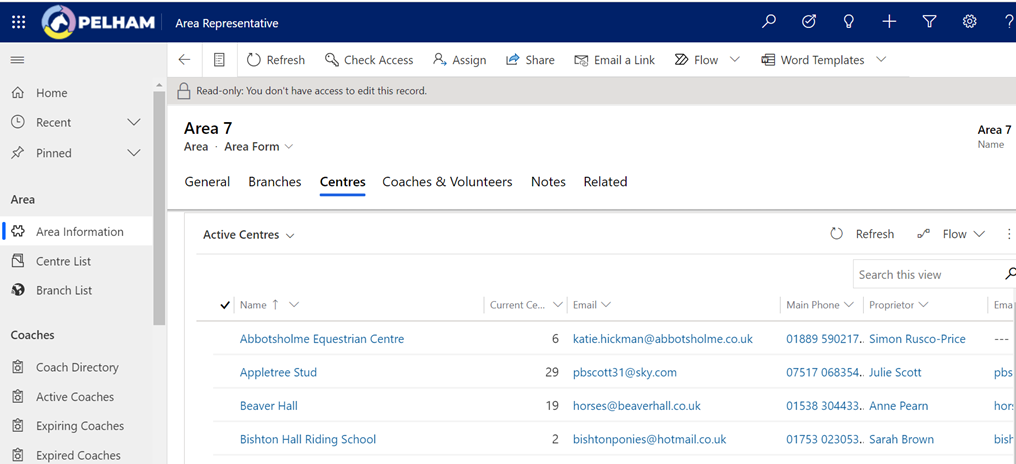
That view will now appear in the “Pinned” drop down list:


To unpin a view or record, click on the pin symbol

3. If you have previously set a recovery email address or phone number, a code will be sent there to enable you to set a new password. If you have not set any recovery details, the request will go to The Pony Club Office who will contact you with a new password.

Changing your PELHAM password

If you would like to change your PELHAM password, please visit https://pelham.pcuk.org/resetpassword

Recommendation to branches that this should be done anytime one of their PELHAM users leaves their branch committee, to ensure that they can no longer access the system.

Once you are logged in, you will land on the “Active Areas” page. This shows all Areas and if you click any Area other than your own, you will see their “General” page but will not be able to view any further detail.

Select your Area and this will take you to the Area Summary Page where you will find your Area details:

Area Summary Page

Here you will find the following sections:

  • General
  • Branches
  • Centres
  • Coaches & Volunteers
  • Notes
  • Related

Within each section there are different views available, for example in the ‘Branches’ section you can view the list of Branches in the Area along with count of members.

NB: This message indicates that the information you are seeing on most of these screens is DISPLAY only.

If you click through to a specific Branch this takes you to the Branch Summary Page where you can search Branch members and achievements. In this view (below) you can change from viewing the ‘Current Branch Members’ to ‘Members expiring within the next 3 months’ or other useful views, including “memberships in progress (unpaid) by clicking the arrow next to the heading

The same can be done for Centres:

You can also view Coaches and Volunteers here by selecting the Coaches & Volunteers tab:

This view will show the coach status (Accredited/Supervised/Expired) and a summary of the qualification expiry dates:

You can view Active volunteers, expired coaches and all Pony Club roles (including Branch officials) here by clicking on the down arrow and selecting the view you require

For further information on viewing and updating Coaches see the Coaches section below.

Viewing Transfers or New Member Approvals

To view the current status of new member approvals or transfers in your Area select the Member Application in the navigation menu on the left hand side:

Here you will first see all outstanding Member Approvals in your area, for you to chase with DCs if you wish:

To view Completed or Transfers, click the down arrow next to New:

Completed Transfers will show; Transfers in progress will not show in here currently, as we do not start to process them in PELHAM until full approval has been received. .

Completed Transfers displays all those that we have processed, and gives the member name, date transfers was processed and From and To branches. You can filter from here to see the most recent, and to select from and current Branch.

To view the Transfer application itself, click on the Name and then Transfer Application in the following screen:

You can then view all the details associated with the Transfer:

How to view and edit details of an existing contact

If you wish to view the details of an existing contact, you can either:

SEARCH by name or number in the top bar:


OR Search the All contacts in the Left Hand Navigation pane:

Wearing multiple hats

 A contact can be an active member, expired member, parent, guardian, coach or volunteer. An individual contact can be allocated more than one contact role.

Don’t miss any info

 Anything marked with a ‘*’ symbol means it’s a mandatory field.

Double click on the contact’s name and you will be taken to their Pony Club record:

Contact Page – Summary Tab

This tab contains the following information about a contact:

  • Update basic information – Title, First Name, Surname, DOB
  • Contact Details
  • Emergency Contact Information
  • Update contact email address

Note: if you need to change the member administrator please contact The Pony Club Office via https://pelham.pcuk.org/support (it may look like you are able to change it but the system will ignore the update and not allow you to save the changes).

As an AR you are unable to amend any contact details, including phone/email or address. If you identify that a change is required please notify the Branch who will be able to make the change.

For a Centre, please notify the Centre Coordinator.

Contact Page – Membership Tab

This tab contains the following information about a contact:

  • View both current and previous memberships
  • View Membership Details
  • Payment Details
  • Both current and previous memberships
How to view Achievements
  1. Select the contact as Above OR click on the Achievement History tab in the Navigation panel:
Power up your search!

 When searching for a qualification it’s best to use an asterisk in front of the qualification, for example *Birds – this will search for any item which contains that word.

ALL Qualification History: 

Every type of qualification, including Coach, for all members/volunteers, current and expired.

Coaching – All Qualifications: 

Summary by coaching qualification. Can be useful to search on coaches with up-to-date certificates (although better to use the Coach status listing from the Area summary page)

2. Here you will see list of all achievement History for the area.

3. From here, you can search or Export to Excel:

Current Members – Achievements and Tests: you can filter your search here by qualification Type:

Or by specific achievement/test:

If you start typing the test name options will come up. It is possible to filter by multiple tests.

NB: Currently you are not able to select members and send an email from this view.


Current members: Blue Badge/Gold Badge / Mini Gold Badge eligible: displays members who have achieved the requisite number of badges for these awards but have not yet had the awards.

Current Members – Test History is another view focused on Tests only:

The same options to filter data are available here, and export to Excel if required.

NB: although member name and number displayed here you cannot search on them as these views are based on Achievements not contacts. If you wish to search a member’s specific achievements, use the Global Search and enter their name/number and click the Achievements tab (see below).

How to Add Achievements – Members
  1. From the ‘Achievements’ tab on the Contact summary page, click ‘+New Achievement History’ as highlighted below:

2. You will then be shown the ‘New Achievement History’ screen where you can add the achievement.

3. Fill in the Qualification and Date Achieved as highlighted below:

4. Finally Save & Close this screen.

How to deactivate an achievement (If you have entered the incorrect achievement)
  1. Firstly, you need to find the achievement you wish to remove from a contact:

2. Select the circle to the left hand side of the Pony Club number to highlight the achievement/tes you wish to deactivate 

3. The deactivate button should then appear as shown below, or by clicking on the three dots:

4. Finally select ‘Deactivate’ and the achievement will disappear from the contacts record, if you wish to add the correct achievement you can now do so using the ‘+ New Achievement History’:

How to add a new Coach/Volunteer Role (to an existing contact)

Please note: only coach and volunteer roles can be added by the Area and branch at this time.

  1. From the Area Summary Page go to the ‘Coaches & Volunteers’ tab, you will notice ‘+New Contact Role’ click this to add a new role.

 If you want to view your deactivated contacts, this can easily be done by switching the default view to “Deactivated Contacts” as shown below:

2. Next you need to fill in the form that appears, choose the role required (Coach, Volunteer etc), search for the existing contact and add the Area – this will ensure the coach is visible across all Branches in your Area.

3. Then Save & Close

How to create a contact role for a new contact
  1. First we need to create the contact itself. Select ‘Contacts’ from the left-hand side of your screen – when the data loads you will be shown your Active Branch Members.
  2. Then select ‘+New’ as highlighted below: 

3. Once the New Contact form has loaded you need to fill out of the required information. Anything marked with ‘*’ symbol means it’s a mandatory field.
On the Summary tab, complete the basic information (Title, First Name, Surname, DOB) and the contact details if necessary:

4. Use the Save icon to save this information.

5. Next go to the ‘Coach/Volunteer’ tab and select ‘+New Contact Role’:

6. From the ‘New Contact Role form’ you need to choose the role required – Coach or Volunteer. Please note: when adding a coach role it doesn’t matter whether you choose Accredited, Supervised or Expired – in time this will update to reflect the qualifications the coach has.

7. Save & Close

How to remove a contact role from an existing contact
  1. Firstly, find the contact you wish to remove the role from using the search at the top of your screen. Then double click their name to go to their record:

2. From the contact record, click the tab ‘Coach/Volunteer’, then double click the role you wish to remove – try to avoid clicking on the contact name or their role, anywhere else within the highlighted box.

You will be taken to their specific contact role page, as highlighted below select deactivate to remove the coach role.

Finally, a confirmation screen will appear, select deactivate to remove the role.

Coach data can be viewed from within the Area Summary page, or the links on the Navigation pane:

The data here does not include the Coach status (Accredited/Supervised/Expired) – to view that you MUST go to the Area Summary page.

These views show coaches at Branches and Centres, but you can filter on any field in the normal manner.

‘Expiring Coaches’ displays those coaches with qualifications expiring within the next 3 months.

How to Add/Update Coach Qualifications

Please note: If you are updating coach qualifications you must add a new achievement history – do not update/change the dates of any existing qualifications.

  1. Firstly, search for the contact you want to add the qualifications to, by using the search at the top of your screen. Then double click their name to go to their record:

2. From the individuals record, select the tab ‘Coach/Volunteer’ and scroll down the page until you reach ‘Active Coaching Qualifications’.

3. Then click ‘+New Achievement History’:

4. From the ‘New Achievement History’ screen, search for the qualification one at a time and add the date achieved. You will notice the options to add badges here too but it’s best to ignore those options and just search for coach specific qualifications.

5.  To search for specific coaching qualifications, follow the steps below:

    • Select the ‘looking glass’ next to the Qualification field:
  1. From the drop down select ‘Change View’
  2. Choose ‘Coach/Volunteer’
  3. You will now see all coach related qualifications

You can add the following qualifications:

  • Safeguarding – Face to Face, or Online
  • First Aid – EFAW/1Day Certification, ESFAC Certification, FAW Certification and Medical Professional
  • Disclosure – Access NI Certification, DBS Certification, PVG Certification
  1. Save and close this screen to add other qualifications.

Adding a disclosure certificate number

  1. Once you have selected the disclosure qualification you will need to input the date achieved and certificate number
  2. Then save & close:

How to deactivate a coach qualification

If you have entered the incorrect qualification or date for the qualification, you will need to deactivate it as follows:

  1. Firstly, you need to find the qualification you wish to remove from a contact:
  1. Double click on the qualification you wish to remove (Avoid clicking the blue text)
  2. The ‘New Achievement History’ screen will load with the achievement you have selected
  3. Next click ‘Deactivate’ in the top left of the screen as highlighted below:

Finally click ‘Deactivate’ on the confirmation window, and the qualification will disappear from the contacts record:

If you wish to add the correct achievement you can now do so using the ‘+ New Achievement History’.

How to add CPD Activities

  1. Firstly, search for the contact you want to add the qualifications to, by using the search at the top of your screen. Then double click their name to go to their record:

From the individuals record, select the tab ‘Coach/Volunteer’ and scroll down the page until you reach ‘CPD Activities’:

Then click ‘+New CPD Activity’.

From the ‘New CPD Activity’ page you need to complete the fields marked with * (Title of the activity, check the contact is correct, date it was completed on and hours of the activity):

Finally save and mark this activity as complete (top left).

Emails from PELHAM

Automated emails are sent from PELHAM to contacts depending on change in status. A summary of these is below:

Renewing members

  • The parent/guardian (Member Administrator) or member if acting on their own behalf, will receive an email for each member confirming the application has been successfully processed and advise the membership number and expiry date
  • If they have opted into Gift Aid, they will also get a separate Gift Aid confirmation email

New Branch Member process and email flow

  • If the member is brand new to The Pony Club, and not subject to the transfer process, then the membership will be in “pending” status until the branch DC has approved it.
  • The above process now works if the member has previously belonged to a Centre, but NOT if they are a lapsed Branch member.
  • An email will be sent to the DC notifying them that a new member has been added to their Branch.
  • An email will be sent to the parent/guardian notifying them that their application is in progress.
  • Once the Branch DC approves the membership in Pelham, then the membership will be set to Active and an email will be sent to the parent/guarding confirming the membership, advising membership number and expiry date.
    NOTE: If a DC chooses NOT to approve this membership then the AR and office need to be notified ASAP to determine next steps, including finding an alternative branch and notifying the member.

Renewing/lapsed Branch member emails

  • Sent to the parent when the membership from a previous year has been successfully renewed, with confirming information as above.

How to export data from PELHAM into Excel

    • Contacts
    • Current Members
    • Active Coaches
    • Achievement HistorySelect any of the following from the side panel of Pelham as highlighted below:

Then choose the view showing the information you want to export:

You will notice there is an arrow by ‘Export to Excel’, you can choose the way you export the data. (If there is not an ‘Export to Excel’ option visible, look for the 3 vertical dots and you will find it here:

Finally download the file and save securely to your computer.

DC approval for new Branch members

When a new branch member applies for membership, via the Portal or membership form, it will only become ‘Active’ once the membership has had the DC approval from the Branch.

AR’s can view status of Member Applications across their area by selecting the “Member Application” in the left hand navigation:

This process can be approved as follows but is a Branch function so this is for information only:

  1. The DC will receive an email informing them a new member has requested to join and is awaiting their approval.
  2. The DC needs to go into PELHAM and approve the membership. Firstly, you need to select ‘Membership Applications’ on the left-hand panel of PELHAM:

3. Here you will see the active membership applications that are awaiting your approval.

4. The Branch DC or nominated person needs to then click on an application.

5. Here you will need to change ‘Approved’ from No to Yes for the membership to become active:

To view member details prior to Approval, click on the “Member Application” and then Contact to view the Summary page.